
Savory Harvest Galette
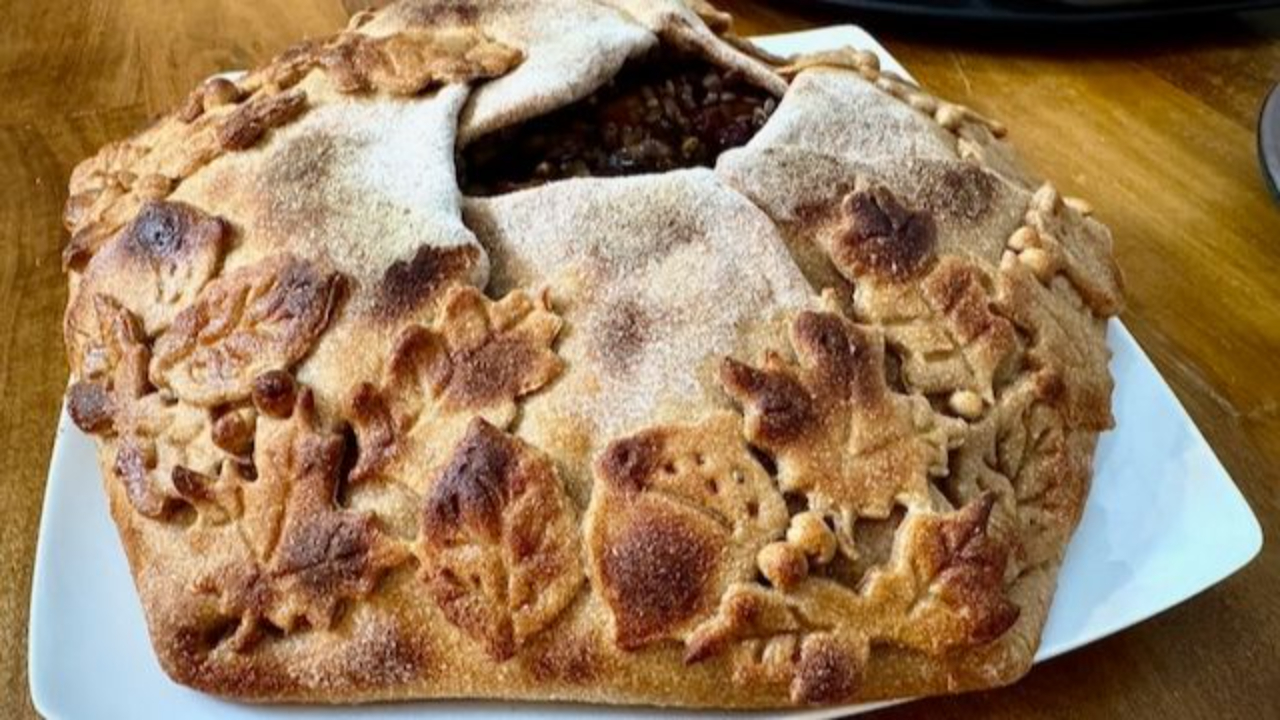
Make a show-stopping plant-based holiday main course with this rustic free-form savory pie filled with wild rice, French lentils, butternut squash, sautéed mushrooms, caramelized shallots, cranberries, and walnuts.
Below I'll walk you through how to create the hearty fall-inspired filling, prepare the dough for the crust, and decorate the exterior with beautiful handmade dough leaves—perfect for holiday gatherings, autumn dinners, and festive plant-based entertaining.
I call it my Savory Harvest Galette, and it makes the perfect centerpiece for your holiday feast. It'll be a delight to plant-based eaters and omnivores alike, as it works as a main course or as a side dish shared in smaller portions among a larger group.
If you're looking for a gluten-free option, make the filling from this recipe, along with the Quinoa Pie Crust from my Roasted Vegetable Tart, then bake them together as a savory pie according to the Tart baking instructions.
Have you arrived here from YouTube? If so, welcome!
If you missed it, you can watch me make this Savory Harvest Galette in my YouTube video.
Click below to watch (the video will open in a new window), and then return here afterward to reference the instructions.
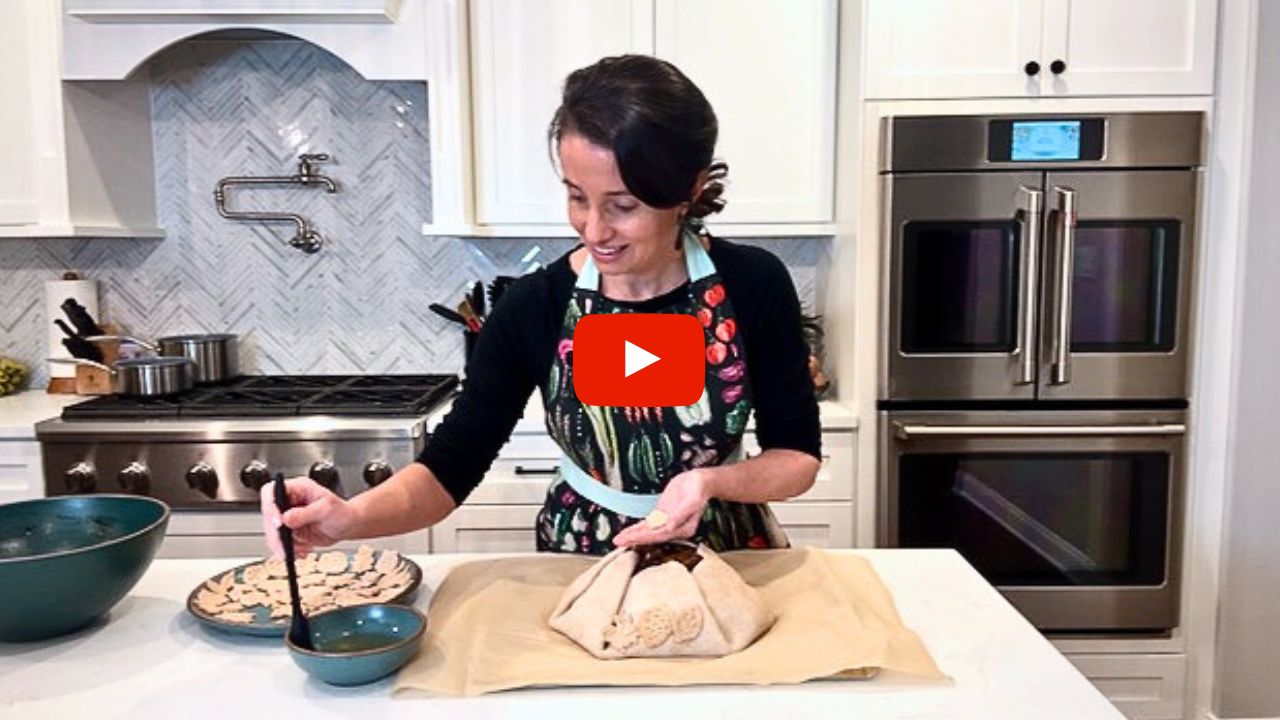
Don't forget to like the video and subscribe to the channel, too!

This recipe serves 6 as a main course, or more as a shared side dish.
Click here to download a printable copy of this recipe.
Quick note: Some of the links below are affiliate links, which means I'll earn a very small commission if you make a purchase through my link, at no additional cost to you. Your support makes my work possible and I appreciate you very much!
💡 Pro tip: Obviously, you can complete this recipe all at once. However, you might find it helpful to split up the tasks over two or even three days leading up to your special dinner. Here are some options:
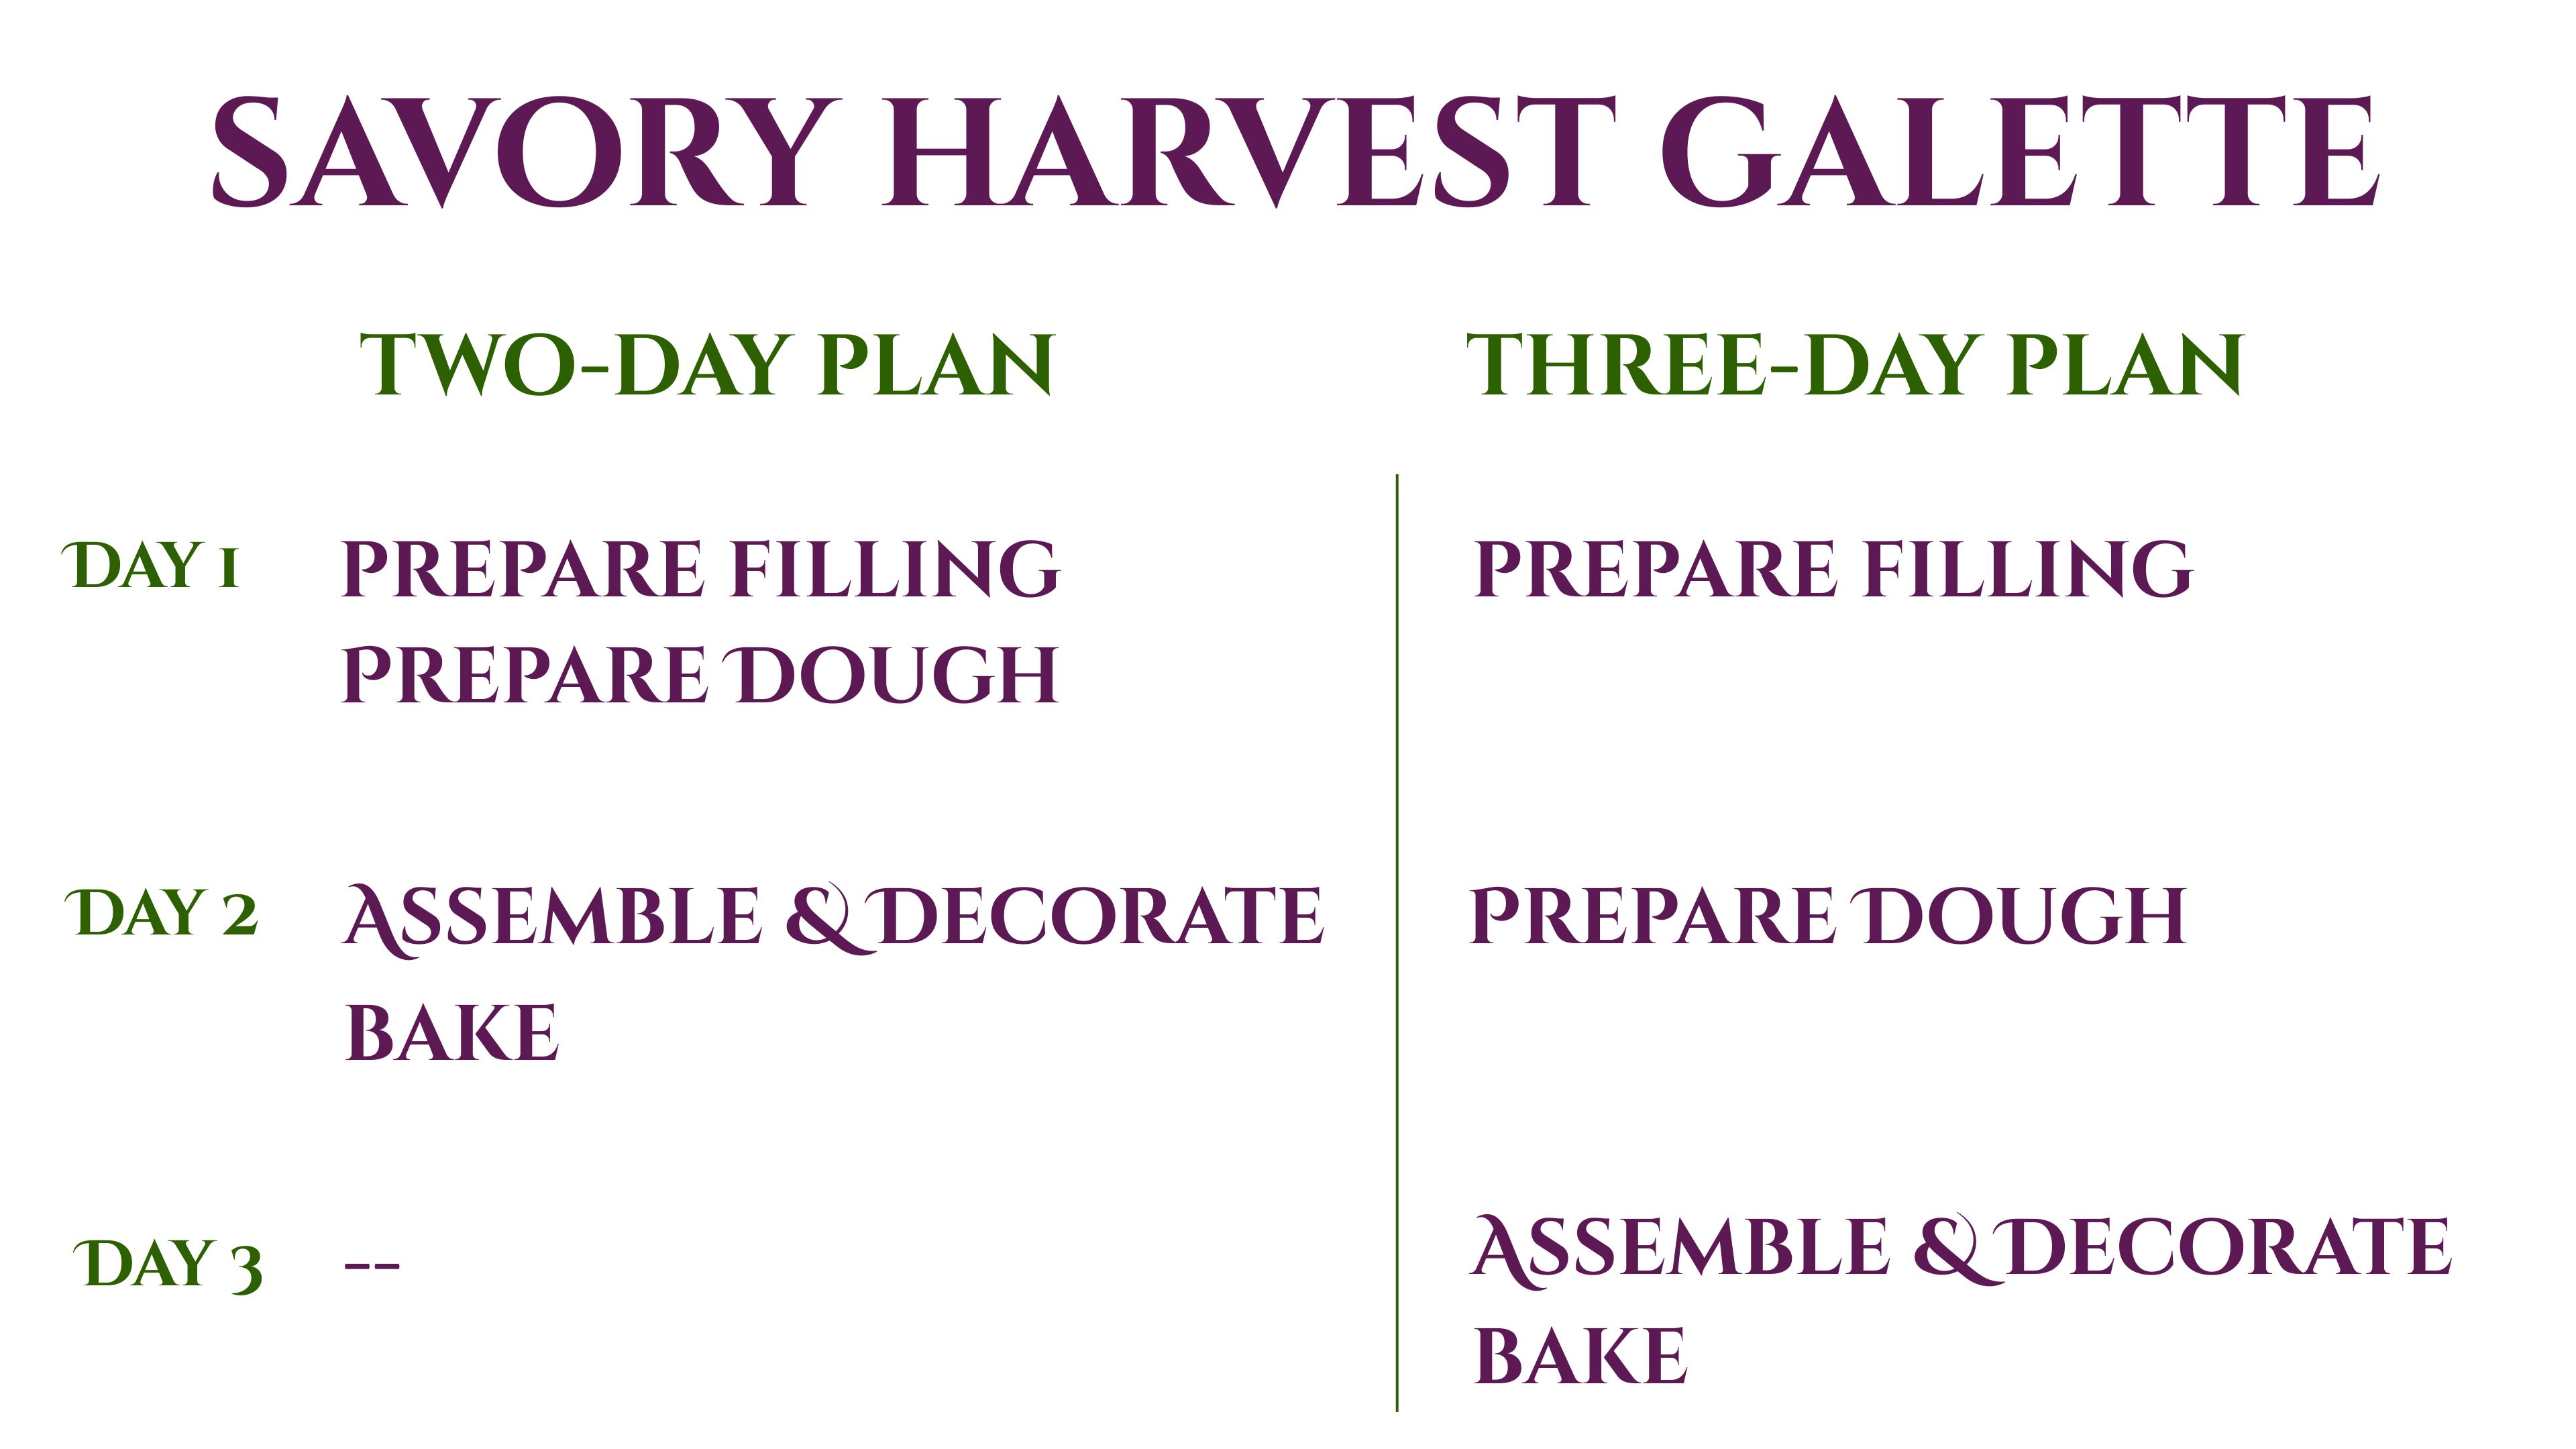
Note that for best results, you'll want to assemble and bake the galette on the same day.
Ingredients
For the Galette filling
- ⅔ cup wild rice blend
- ⅔ cup French green lentils
- 4 cups butternut squash, diced small
- 1 tsp blackstrap molasses (optional)
- ½ tsp salt
- 1 tsp avocado oil (or 4 Tbsp vegetable broth for an oil-free option)
- 3 large shallots, sliced
- 6 Tbsp vegetable broth, or as needed
- 3 cups cremini mushrooms, diced
- 3 large cloves garlic, minced
- 1 Tbsp fresh rosemary, minced
- 1 Tbsp fresh thyme, minced
- 1 Tbsp fig balsamic vinegar
- ½ cup sweetened dried cranberries
- ⅓ cup walnuts, chopped
For the Galette crust and decorative leaves
- 1¼ cup whole wheat flour
- 1¼ cup all-purpose flour
- 1 tsp baking powder
- ½ tsp salt
- ½ cup plain, unsweetened plant-based yogurt
- ¼ cup aquafaba (liquid from a can of chickpeas), plus 2-3 Tbsp
- ½ cup water
- 1 Tbsp maple syrup
Instructions
Cook the wild rice and French green lentils, in separate pots, according to package instructions.
Preheat the oven to 400°F and line a baking sheet with parchment paper.
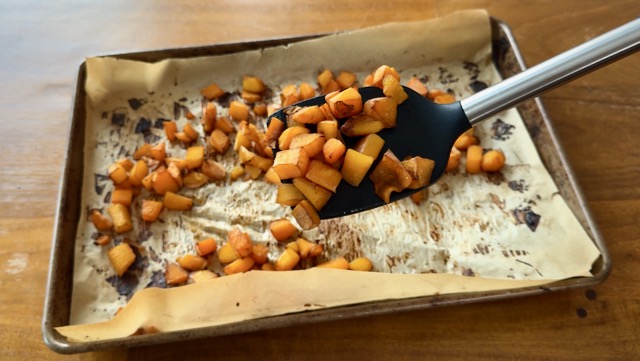
Place the butternut cubes in a mixing bowl. Drizzle with about 1 tsp of molasses and sprinkle with salt. Stir until the squash is lightly, evenly coated in the molasses.
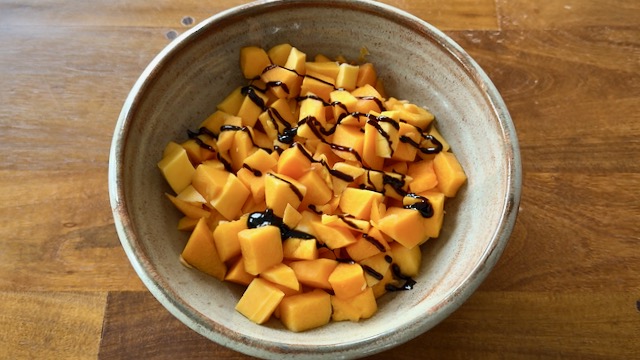
Spread the squash over the baking sheet in a single layer (in other words, try to avoid overlapping the pieces) and roast for 30 minutes, flipping with a spatula once at about the 20-minute mark, to ensure the pieces will roast evenly.
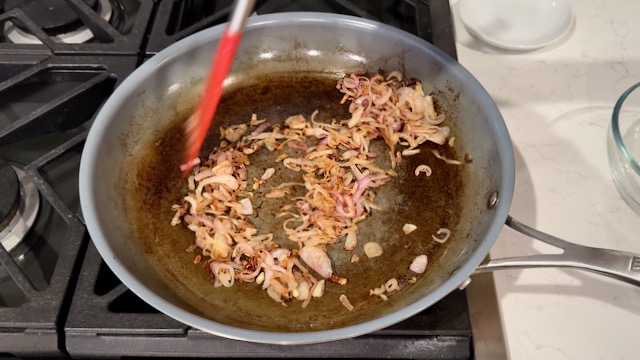
Heat the avocado oil (or veggie broth) in a frying pan over medium-high heat. Add the sliced shallots, sprinkle with salt, and stir. Continue cooking, stirring occasionally, until the shallots have browned.
Note: If you're using broth instead of oil, you'll need to continue adding more broth, a splash at a time, as the broth evaporates. Remove the caramelized shallots from the pan and set aside.
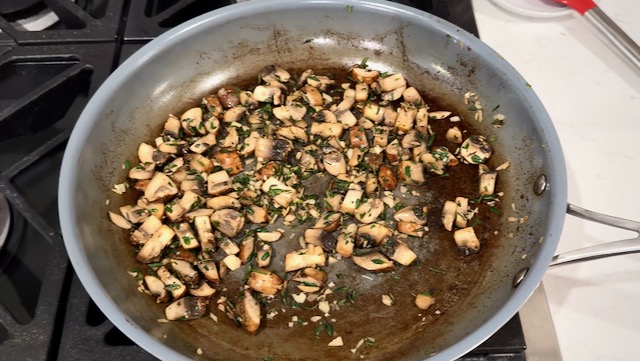
Heat a few (more) Tbsp of vegetable broth in the same pan. Add the diced mushrooms with a sprinkling of salt, and stir until softening. Add more broth as needed to prevent sticking.
When the mushrooms begin to release their own moisture, add the minced garlic, rosemary and thyme. Continue stirring for another 2 minutes. Turn off the heat and set aside.
In a mixing bowl, combine the cooked wild rice and lentils, roasted squash, sautéed mushrooms, and caramelized shallots. Stir.
Drizzle with fig balsamic vinegar (or regular balsamic vinegar if you don't have the fig-sweetened variety) to taste, just be careful not to add too much; start with just 1 Tbsp at first.
Fold in the dried cranberries and walnuts.
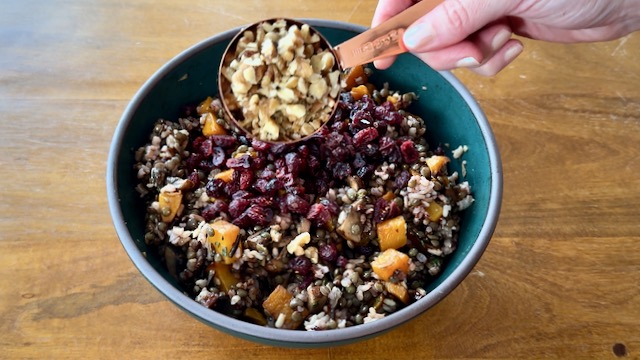
Taste the filling mixture and adjust seasoning to your liking. You may want to add more salt and some black pepper, and/or add more vinegar.
In a large mixing bowl, combine1¼ cup whole wheat flour,1¼ cup all-purpose flour, 1 tsp baking powder and½ tsp salt. Stir well.
Add ½ cup plant-based yogurt and ¼ cup aquafaba to the dry ingredients.
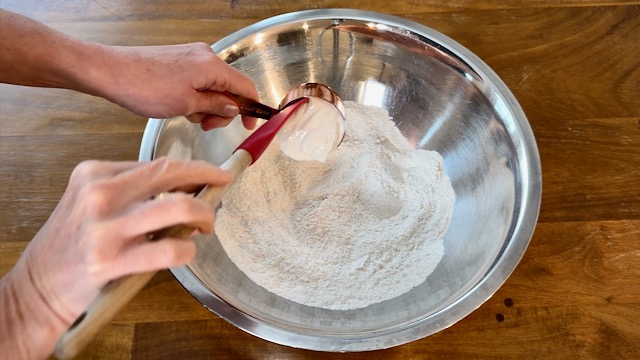
Then stir until the dough looks "shaggy." The best tool for this is a pastry blender (also known as a pastry cutter) but you can just as easily use a fork or even a silicone spatula.
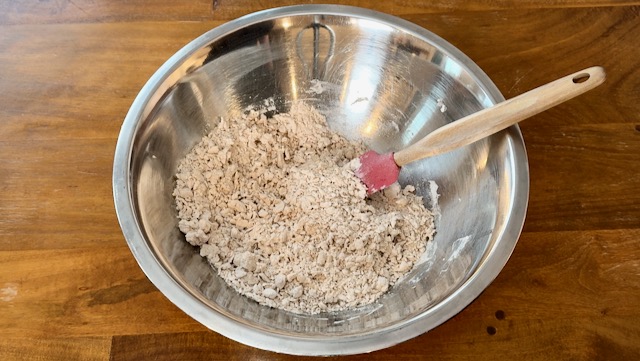
Add ½ cup of water and stir until the dough forms a cohesive ball, adding more water as needed, 1 or 2 Tbsp at a time, using only the very minimum amount necessary to pick up all the loose flour in the bowl.
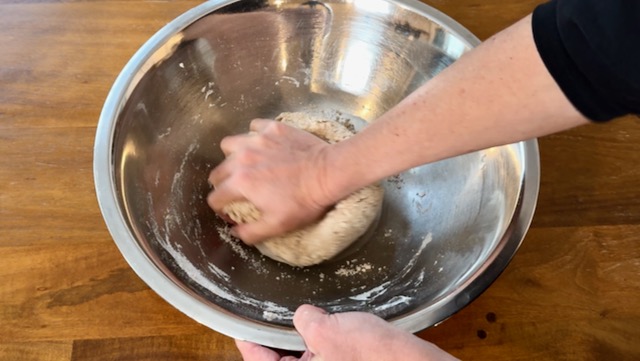
Knead the dough for 5 minutes or until smooth.
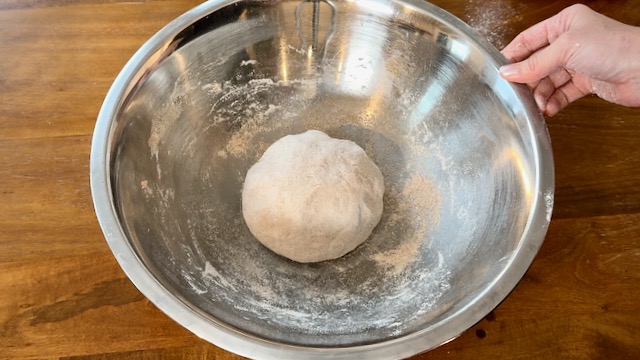
Cover with plastic wrap.
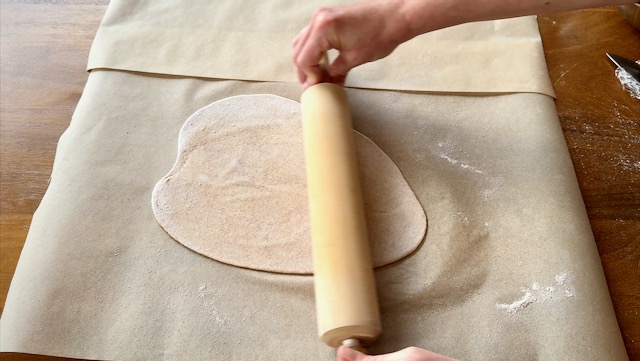
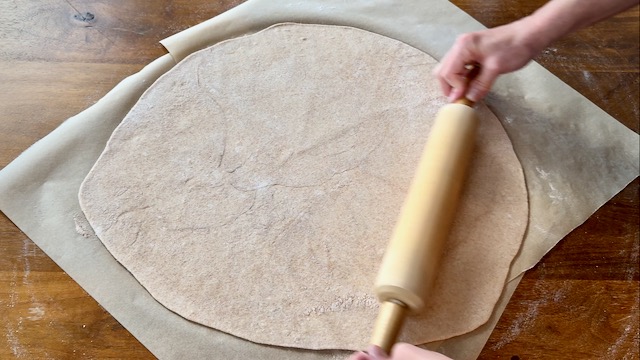
Lightly flour a parchment-lined work surface. I usually tape two pieces of parchment together to form a larger work surface.
Note: If you do this too, remember to remove the tape before baking, and transfer the galette crust to a single layer of parchment, as show in the video, just to make it easier to slide a baking sheet under the whole thing.
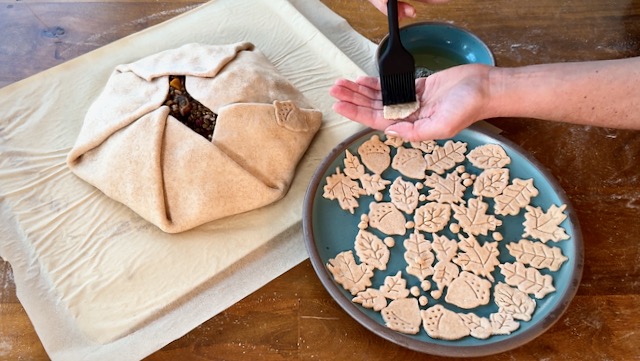
If you're doing the dough leaf decoration, cut off about ¼ of the dough. Roll it out until it's ⅛ inch thick.
Use cookie cutters to make dough leaves.
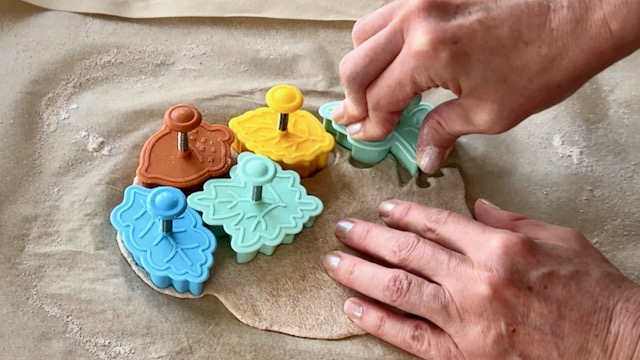
You get bonus points if your cookie cutters have stamps in them, like mine do, to make impressions in the top surface of the cut-outs. You can get these on Amazon, and I've included links below to those.
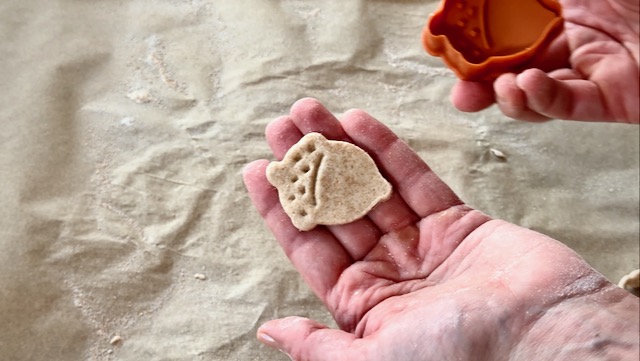
As you make the leaves, collect all the scraps of dough, form another dough ball, press it out, and then roll it out again. Continue making cut-outs until you think you've gotten all the leaves you can out of the smaller portion of dough.
If you have any other dough remaining, pull off tiny bits smaller than a pencil eraser and roll them between your hands to form "berries."
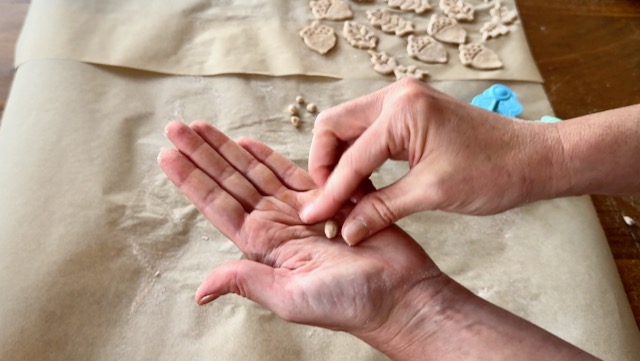
Place the leaves and berries on a plate and cover them with plastic wrap so they won't dry out.

Re-flour your work surface. Roll out the remaining larger portion of dough in a rough circle, about ¼ inch thick. The circle doesn't have to be perfect, but the end result will look nicer if your circle isn't too irregular.
Slide a baking sheet under the parchment paper beneath the crust, and preheat the oven to 400°F.

Place the filling mixture in the center of the crust, leaving a substantial margin all the way around.
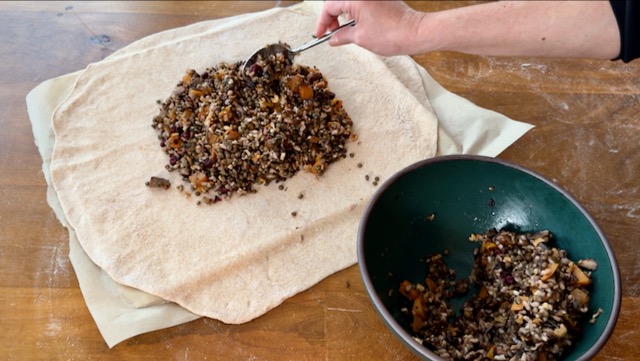
Press the filling gently to firm up it's mound-like shape.
You may choose to make a tall rounded mound of filling like this...
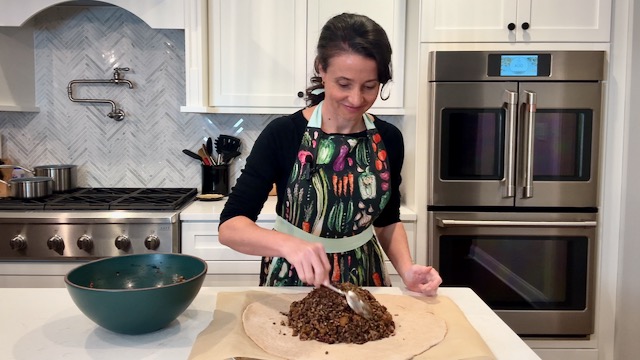
...or you may choose to flatten it out to make a flatter, wider galette with a larger gap in the center of the crust, as shown below. Both look really pretty; this is a matter of personal preference!

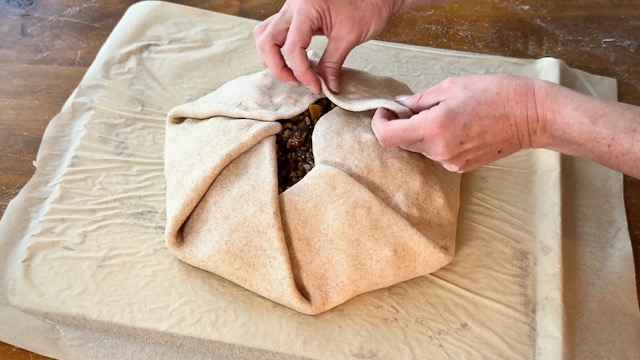
Fold the crust upward toward the center of the filling, stopping short of the centerpoint.
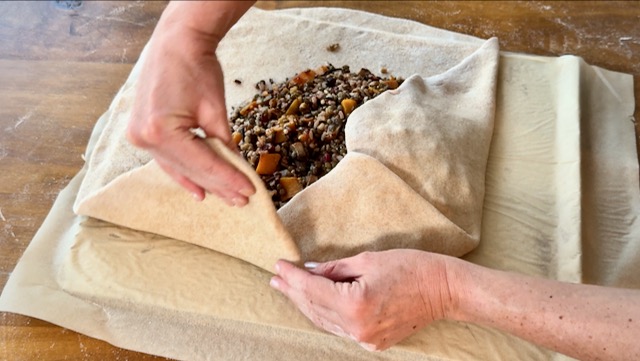
Continue folding the dough inward, in slightly overlapping sections, all the way around, to form the galette.
To adhere the leaves to the galette crust, use a silicone pastry brush to paint a thin layer of aquafaba on the back of each dough leaf. Brush some aquafaba on the galette where you'd like to place each leaf.
Gently press the leaf onto the galette crust like a sticker.
Continue working this way, sticking on dough leaves. Start close to the bottom of the galette and work your way around. I think it looks nicest when the leaves very slightly overlap each other.
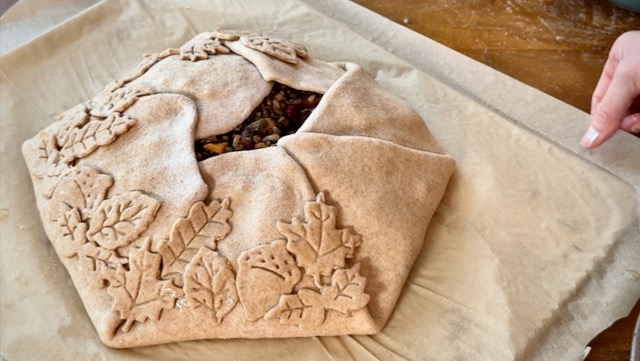
If you have leaves left, begin stacking them up the sides of the galette. This creates the illusion of an accumulation of fall leaves, or like they're growing up the sides on a vine.
Place any dough berries you have in the small spaces between the leaves. You'll want to brush these with aquafaba too, before sticking them on. I think the berries look nicest when, in some places, you cluster a few together, and in other places you leave some berries solo.

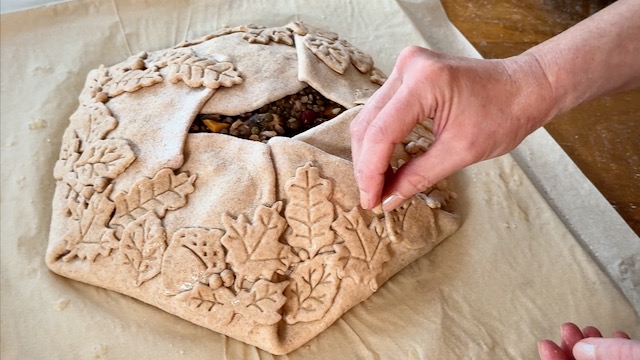
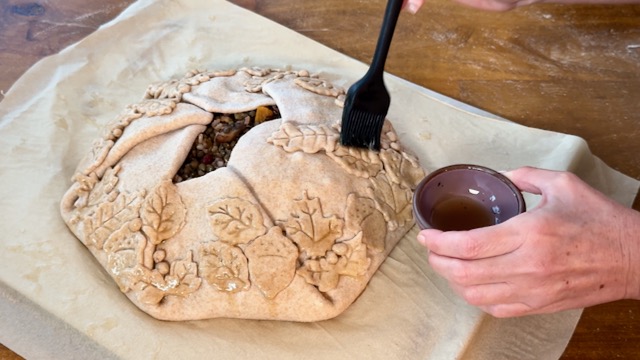
As one final, optional decorative step, brush maple syrup only on the leaves and berries. This will help them brown in the oven, making them stand out more against the background of the galette crust.
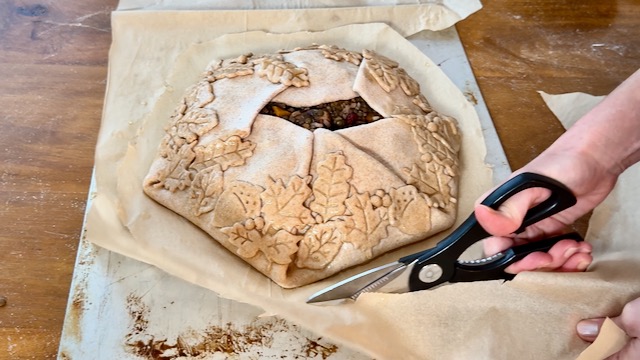
Cut away any extra parchment paper that would extend beyond the edges of your baking pan so it won't get charred in the oven.
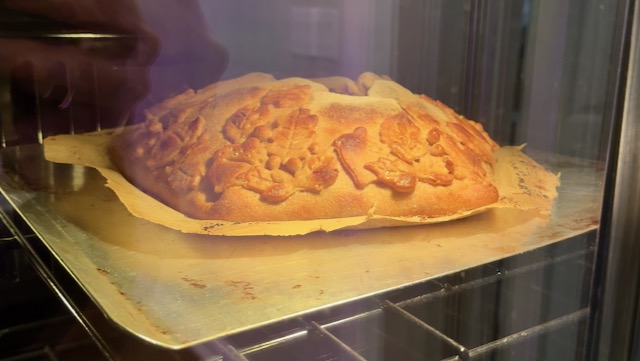
Bake the galette for 20 minutes, or until the crust is golden and firm.
Serve and enjoy!

Note: I've been cutting these Galettes into pie-shaped slices with a pizza cutter (the rolling type), however a large chef's knife will also do the trick!
Equipment Links
🌸 Fall leaves cookie cutters: https://amzn.to/48uCX9T
🌸 Fall harvest cookie cutters: https://amzn.to/4o9JZWf
🌸 Silicone pastry brush: https://amzn.to/4p1iBLs
🌸 Pizza cutter (wheel style): https://amzn.to/44b8QSH
Ingredient Links
🌸 Wild rice blend: https://amzn.to/4pnbdty
🌸 French green lentils: https://amzn.to/4riZC0e
🌸 Black strap molasses: https://amzn.to/4rhNWuT
🌸 Fig balsamic vinegar: https://amzn.to/3XLPT57
If you see something in my kitchen not listed above and want to know where to get it, please email or message me and I'll find you a link if I can!
You can also check out my Amazon Storefront for a pretty complete list of my kitchen equipment recommendations.
